Sunday, March 30, 2014

Test prep that's as easy as . . . A B C!

Standardized testing season is upon us! Now, in my state 2nd graders no longer take multiple choice format, high stakes tests, but BOY HOWDY do I remember when we did! I thought I'd share a few tips that I gleaned from years of agony. Oops, I meant to say testing. My bad! I get those two terms mixed up all of the time!

These activities are super easy, interactive, and fun! Yes, it is possible to review key content and not use a scantron, paper, or even a #2 pencil!
All you need  is some black construction paper and bright or neon colored copy paper. I die cut a class set of the letters A, B, and C. Then I glued them on one sheet of black paper, laminated them, and cut the page into fourths to make these little cards. It took maybe 20 minutes from start to finish! I use these cards for each one of these activities!

Activity #1 Texas Hold 'Em
I have used this activity as a whole group and in small groups. I always make a BIG deal about how "we don't allow no cheatin', peekin', or smilin' 'round here!" You've got to use your best poker face in Texas Hold 'Em! We would read the question and answer choices.  Everyone would stay totally straight-faced! Then, you reach under the table or inside your desk.  Choose the card that will be your answer. Turn it face down and hold it to your chest. Don't let ANYONE see your card. I would do the same thing. On the count of three, all of the kiddos would lay their cards on the table revealing their answer. Then, with much drama and fanfare, I slowly revealed my card! While they either rejoiced or moaned, I noted who missed that particular question. I usually used a blank page from my gradebook with their names down the side and the question numbers across the top. Thanks to the bright colored letters, wrong answers really stand out! Then, I had great data on what questions were missed and by whom!

Activity #2 Read Your Teacher's Mind

This activity was always a hit in my room! We used the same set of cards as before, but this time the kids had to try to read my mind. We would read the question and the answer choices. I would choose the correct card and hold it up to my head. The kids would have to "read my mind" and see if they could match my answer. 
It was all I could do not to crack up during this activity because I always thought I looked like Johnny Carson when he did his Carnac the Magnificent bit on The Tonight Show!
The kids choose their answer and hold up to their head just like you are doing!
Then, you give the signal and they flip their card over on their forehead. After you scan the room, reveal your card and they get to see who read your mind!

Activity #3 Grab It and Go!
For this activity, I posted an extra set of cards in three corners of my classroom. The corner by the closet was A. The corner by the bookshelf was B. The corner by their backpack hooks was C. The kids laid their cards face up on their desks. We read the question and answer choices. We all said, "Grab it and go!" Then, they snatched up the card that was their answer. They hustled (walking only--no running or pushing) to stand in that answer's corner. I had tried just doing the corners without the cards, but I ended up with some kids who just followed the crowd aimlessly.  This way, they have to commit to an answer before they leave their work space. 


The kids love saying, "Grab it and go!" They have to leave their space right after we chant that.  No stragglers allowed!

Tuesday, March 25, 2014

Purposeful Small Group Seating

How much thought goes into your small group seating arrangement? For many years, my method was a blend of a game of musical chairs and "You must think I have lost my ever lovin' mind if you think that you two can sit next to each other!" Then, I heard something that sounded trivial at a Professional Development Seminar, and it ending up being quite helpful! ( I know! I can hardly believe it myself! I got something useful out of a PL Day! I will try to refrain from mentioning that it is one of only two things that were helpful the entire day. Oops! I think it may have slipped out anyway! Hee hee!)

Brace yourself! Here it is! Get ready...........

Research has shown that in a small group setting teachers spend the vast majority of their time focusing their attention and instruction on the students seated directly in front of them. (See?!? Sounds like earth shattering news, right?)  However, it truly can make a difference! I even made you a cute visual aid with the help of some new clip art from the talented Nikki at Melonheadz. 


We all know that there are levels within levels in small group instruction.  So, here is what my assistant and I do. We seat the students most in need of help directly in front of us. Students who need less help than them are seated in the middle. Students who require the least amount of help are seated directly to the left and right of the teacher. Previously, I would have seated the ones most in need of help on either side of me thinking that I would have better access to them and their work. After two years of teaching almost exclusively in small groups, I can tell you that I was wrong!  I am more mindful of my attention now and it most certainly is projected forward rather than to the side. 

I hope that this little tip will be helpful to you! So, how do you seat your students in a small group setting?

Saturday, March 22, 2014

Author's Purpose with a Freebie


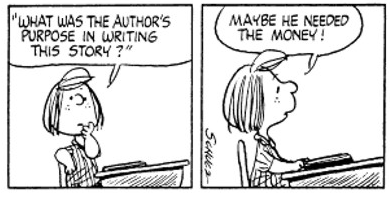
Sadly, Peppermint Patty reminds me of some readers I have taught over the years! These kiddos often think that if they read a nonfiction book about caterpillars and enjoyed it, then the author's purpose must have been to entertain them. Persuasive text is often entertaining to read. Sometimes entertaining text has a few facts thrown in.  What is a young reader to do?

I recently posted a new product in my store that covers author's purpose. This is a quick snapshot of one of my favorite activities from that set. Students find the three strips with matching pictures. Take a peek at the ones with the cupcakes. One sentence is persuasive and could be from an advertisement. Another tells information about cupcakes. Then, there is one with some dialogue that sounds like realistic fiction. The kids have to sort the author's purpose for each sample sentence. (I think Peppermint Patty's teacher might want to assign her this task during literacy centers next week.)


You can check out the full pack by clicking HERE


I am ALL about integrating writing whenever I can. So, I whipped up a FREEBIE to share with you!

The Magic Tree House series is just one example of the kind of text that can be confusing when teaching author's purpose.  I mean HELLO they are very entertaining AND they contain lots of cool facts! So, I say use it to your advantage!  Have your kids vote for the author's purpose on an anchor chart like this one. (I included the pics of Jack and Annie in the freebie link if you want to use them.) 

Now that they have shared their opinion and have invested in the dialogue, have them do a quick opinion piece to justify their vote. You can grab this FREE organizer and the Jack and Annie images by clicking HERE


Good luck ridding your room of Peppermint Patty style thinking!  I would love to hear your ideas for teaching this concept! 


Wednesday, March 19, 2014

My Favorite Finds #2

Okay y'all, I am keeping it real here when I tell you that I almost hyperventilate when the time comes to teach  3 digit subtraction with regrouping to my 60 RtI babies!  You add in a full moon this week and it is the perfect storm! However, there is a site that has saved me from breathing out of a paper bag for years now!  My RtI and Inclusion kiddos are often very visual and need to truly see how math works. However, staying focused and using base-ten blocks at the same time can be a little or maybe A LOT more than I can expect of them.  So, this presentation is a happy little compromise!  To save you some trial and error and a boat load of time, I made a little tutorial to go with this FABULOUS site.  Click HERE to check it out!  They have TONS of virtual manipulatives, people, TONS, I say! This is how the site looked on my SMARTboard today.
The kids sat in the floor with their question sheet on a clipboard. We built and solved the problems step by step.  It was a magical moment when one baby said, "I finally know what this is all about!" As Junie B. would say, "My eyes got a little bit of wet in them!"  I hope this is helpful to you!  Enjoy!
\


I would love to hear from you if you give this a try!  

Thanks!

Saturday, March 15, 2014

Cause and Effect: anchor chart, mentor texts, and a freebie!


Cause and effect can be such a difficult concept for young readers. I think this is true for a few reasons.
1. Kids can be egocentric. They often respond with what they think the effect would be for them.
2. Evaluating cause and effect takes some real thinking! You have to analyze text in some complex ways.
Therefore, kids who can often answer literal who, what, when, and where questions may struggle when comprehension requires more thinking like determining cause and effect.

So, what's a teacher to do? I think modeling and interactive activities can certainly help.

Here is an anchor chart that I made. Using characters from a series helps students really have a good feel for how the characters react in different situations. On the chart, the characters are sharing an experience or a cause, but due to their character traits the effects will different for each of  them. This one features Junie B. Jones, Crybaby William, and Lucille.


Mentor texts are another wonderful teaching tool. Here are a few of my all time faves!


The Day Jimmy's Boa Ate the Wash is a wonderful example of  tracing the effects back to their causes.
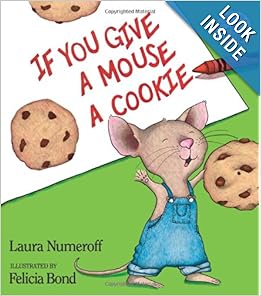
The entire If You Give series is perfect for If/Then cause and effect statement modeling!

This book is an awesome example of multiple causes leading to one effect: a terrible, horrible, no good,
very bad day!


My kiddos always loved being surprised by the unexpected chain of causes and effects in this book!
In this sweet story, the animals find out that the farmer has bought a kangaroo. They spend the rest of the day pondering the possible effects of the farmer's new purchase.


This story does a wonderful job of demonstrating a circular chain of cause and effect. Murdley Gurdson gets an egg dropped on his head. How could it possibly be his fault? Kids love tracing the action back to him.


You may be interested in my latest product on Cause and Effect. It has anchor charts/presentation, a center, guiding activities, and reading comprehension activities. You can check it out by clicking here! Scroll down to grab a FREE copy of a sample page from this unit!


Here's your Freebie!  The clip art is by the talented Kari Bolt. Click here to download your copy! Enjoy!


What have you found helpful when teaching cause and effect? I would love to hear your ideas!


Tessa @ Tales from Outside the Classroom is having a fun anchor chart linky. Check it out {HERE}!


Wednesday, March 12, 2014

Differentiation and Task Management in the Computer Lab

I have really been trying to find a way to make my computer lab time more meaningful for my students. We visit the lab every other Monday. While they work on the computers, I pull students individually for progress monitoring. While the kids usually enjoy this time, I wanted to make sure that I was really maximizing this as instructional time. I also want to be sure that these sessions are differentiated properly. So, I came up with a menu management tool.  I will explain more below, but first I wanted to show the site that I just found out about!  Maybe you already know about it and I have just been living in a cave, but please bear with me! :)
It is called Turtle Diary. I am totally loving this site! It is full of free games. I found a lot of appropriate content for my RtI 2nd graders under the first grade tab. You can check it out by clicking here! Our school gives the MAP test by NWEA. So, I am loving the interactive features and that there is a speaker icon that functions exactly like the one on the upcoming test!

So, here is how I created my menu management tool. Please forgive me for spelling out each step.. I don't know how tech-savvy you all are. So, if you are up to date on computers and such, feel free to skim!

1. I went to the site and made sure that my screen showed exactly the images that I wanted. On your keyboard (usually up from the insert key and to the left of F12), there is a print screen button. Push it. It will look like nothing has happened. Nothing will print, but it does take a picture your screen. Now, open a new document (I personally prefer PowerPoint), and click paste. Voila! The picture should appear.

2. Now, have fun cropping the image and getting rid of anything you don't want showing on your document.

3. Repeat for whatever other sections you want. It took three screen shots (print screens) for me to capture everything I needed.

4. Once I had everything looking all hunky dory, I printed a class set of my menu on card stock and laminated them.

Here is how the finished project looked.

Now, for the differentiation component. Since these are laminated, I can write on them and wipe them off. So, I can customize each student's menu. I am planning to circle three activities for math and three for language arts. #1 will be a review of previous content or a skill that the student has struggled with mastering. #2 will ask them to practice something we are currently studying. #3 will be a preview of upcoming material. 

I really think that this will prevent students from clicking from one game to another randomly. They are psyched about getting their own custom menu on Monday. We have been previewing one game a day on the SMART Board as an introduction to group time and they are itching to start! One of my kiddos said, "I can't wait to see my menu! I hope she picks Math Blaster for me." That makes me one happy teacher! 

Got a favorite site to recommend?  How do you manage your computer time?

Friday, March 7, 2014

Subtraction with Regrouping Tip and Freebie

Once my sweeties learn to regroup, they start crossing out every number in sight! So, to slow them down and make them think, we added a step to the regrouping process. Before they cross out anything or subtract any number in a multi-digit problem, they have to answer this question: Which has more: top or floor? When they decide, they put a tiny dot beside the larger number. From there, we follow these rules.

1. If the dot is on top, you don't have to stop.
2. If the dot is on the floor, regroup to get more.
3. If the numbers are the same, then zero wins the game.

Placing the dot comes in handy throughout the regrouping process. Our interventions next week will focus on three digit subtraction. So, you just repeat the process for the tens place. Which has more, top or floor? This simple tip has really helped our struggling mathematicians slow down and think it through.

If you would like to have these free anchor cards to post or make into a flip book, just click HERE


I would love to hear if these are helpful. What have you found that works?


Tuesday, March 4, 2014

RtI: Progress Monitoring and Data Organization Freebies

Behold my "Big Behemoth" Binder! I don't know what I would do without this thing! It is a 3" binder that holds the critical data I need almost daily on every one of my 60 RtI kids. I love that I can take everything I need on EVERY student to an RtI team meeting. No matter which students we need to discuss, I have data at the ready! I can also pop open the prongs, pull out data on one or just a few students and be prepared for a tier 3 meeting with a parent, a parent/teacher conference, or a meeting with the county educational psychologist. I have tabs for each student to make filing a breeze.
If you like the binder cover, you can get them for FREE in Cheryl Smith's TPT store. They are editable and come in nine different colors. Stop by and download them. Don't forget to leave her some sweet feedback!
Click here to download.

What's inside you ask?  
Well, my progress monitoring reading data is inside, for sure! Last year, I put together a freebie with links to free fluency passages, phonological awareness testing, a quick phonics screener, and sight word inventories. You can check it out by clicking here. Make sure that you have updated your Adobe Reader or the links may not work for you. 

Next year, I think I will change out my current phonological awareness inventory for this one created by my friend at Georgia Peach That Loves to Teach. You can download it for free by clicking here. (Don't forget to leave some feedback!)

I am very curious about how you decide if students are tier 2, 3, or should be tested for tier 4? I made up some mock data pages from my freebie to show how my RtI team makes decisions about tier placement. I would love to hear what you think. Where would these mock students fall in your RtI pyramid?


I can't wait to hear what you think! How do you organize and track your RtI data? Got any suggestions for improving this system?