Sunday, August 17, 2014

Listen Buddy: Book Chat and a Freebie


Listen Buddy by Helen Lester is my other favorite book for teaching listening expectations during the first few days of school. Buddy may have beautiful big ears, but he doesn't listen! When his parents ask him for a slice of bread, he shows up with a slice of bed! His funny antics aren't so funny though when he runs into the Scruffy Varmint who doesn't like little bunnies who don't listen. Here is a little book trailer so that you can get a better view of the hilarious illustrations that Lynn Munsinger created.


I have whipped up a little book study to go along with this funny tale. It includes lots of standards based skills practice and even a few fun listening activities, too! You can check it out {HERE} or by clicking on the picture.


What's a book recommendation without a freebie? I love sharing ideas with you all! This little flip book is super easy. Just fold the organizer in half down the solid line. Then, cut on the dotted lines to make four flaps. It is up to you what you want to require the students to write or draw inside for each story element. I hope this story helps your students become good little listeners!

I am also working hard on getting my classroom ready! I hope to have my room reveal ready to post in a day or two! 


Thursday, August 14, 2014

Authors in the Spotlight Update


As promised, I just finished updating my Authors in the Spotlight product. I added biographies, birthdays, and contact information for Lewis Carroll, Tomie dePaola, Julia Donaldson, Anne Fine, C.S. Lewis, Leo Lionni, Laura Numeroff, Barbara Park, Peter H. Reynolds, J.K. Rowling, Shel Silverstein, and E.B. White!  If you have already purchased this product, visit your My Purchases page on TPT to grab this new set for free! If you have not bought it yet, you can check it out {HERE}.

One of the authors in this set is Peter H. Reynolds who wrote The Dot. I found this nice read aloud/animated version online and thought I would share it with you. Enjoy!


Wednesday, August 6, 2014

Character Collage Project

My elementary school's media center had murals of popular characters painted on the walls above the shelves. I can remember seeing Ramona Quimby, Pinkerton, and Corduroy lovingly hand painted onto the cinder block walls. Maybe that is why I was so inspired by a project I saw on Instagram by Apples and ABC's. She had created art for her new Dr. Seuss themed classroom. You can see her beautiful work {HERE} on her blog. I decided that I wanted to do something similar for the space behind my guided reading table in my room. I shared my finished project on Instagram and Facebook. A lot of you had questions about how you could do something similar. So, here is a quick step by step guide to how I made this project.
Step One: Gather Supplies
Sweet Girl and I made a run to Hobby Lobby. I bought black acrylic paint, Glossy Mod Podge, foam brushes, and 2 packages (12 tiles) of Master's Touch Artist Canvas Panels. These were thin and 8 inches square.


Step Two: Who to Include?

While the family watched a movie, I started brainstorming a list of my 2nd graders favorite characters, series, and authors. Then, based on images I could find or personal preference, I narrowed my list down to enough for 12 tiles. For individual characters like Froggy, I thought I might could do a collage of many characters on one tile.

Step Three: The Search Begins
I started searching through Google Images by title, author, or character name. I looked for crisp images that would fit the space I had in mind. This one was a winner because it would be easy to cut out and it had three of the characters I wanted in one shot. I just right clicked and copied the image. 

Step Four: Creating a Document
Using the design tab in Power Point, I set up my slides to be 9 inches square. I knew I would need to buffer for printing. This size slide gave me a good perception of how the images would look on my canvases. Here you can see how the image above looked on the slide.
Here you can also see how some of the images looked before they were cut out and arranged.
Sometimes I used more than one slide. For my Dr. Seuss canvas, I used one slide for the characters and another for the truffula trees. Later, I would layer these images.

Step Five: Print, Paint, and Cut!
Sorry but I didn't get any pictures of this process. 

Important: Print your slides on CARDSTOCK! Copy paper is too thin and tears too easily! 

Basically, I covered the table with paper. Then, I used a foam brush to do two coats of black acrylic paint on each canvas. While they were drying, I cut out the images I wanted and toyed around with how to arrange them. 

Helpful hint: Eliminate all white space when cutting out the characters. Sometimes I had to make a tiny cut to get through to the white space by a character's arm or something. I knew it would be okay because the mod podge would glue it all back as one image anyway. 

Step Six: Let the Fun Begin!

Once the paint was dry and the images were ready, I slathered mod podge all over the canvas with a foam brush. I laid the cut out images on top and then sealed it down with more mod podge. Here is a peek at one freshly mod podged. 

Step 7: Enjoy!

Once it's done drying, have fun arranging your tiles and deciding how to display them. I thought about adding ribbon and hanging them on command hooks. Instead, I decided just to hot glue them to the wall as is. I will post pictures when I do my classroom reveal soon.
I would LOVE to see pictures if you decide to give this a try! What characters will you use? 

Thursday, July 24, 2014

Getting to Know the Teacher Freebie

Many moons ago, I had a super sweet mama send me a survey in her son's folder on the first day of school. She wanted to know more about me, my likes, and my dislikes. Then, on my birthday, Christmas, Teacher Appreciation Day, and at the end of the year, she used my responses to get absolutely perfect gifts for me. I thought that was a wonderful idea!

Once my kids started school, I stole borrowed her idea. I always find it very helpful to have a list of gift ideas to pull from for their teachers (especially once my kids leave the school where I work and I don't know their teachers as well).

The computer that I had this stored on is no longer in use. So, this morning, I whipped up a new one. I thought you might like it, too. I included a color and b/w version.

If you don't have school age kids, this survey works well for your grade level teammates, too! I hope you can use it! You can grab your freebie {HERE}. :)


Tuesday, July 22, 2014

A Porcupine Named Fluffy Book Chat

Back to school means meeting lots of new people and learning lots of new names! I always read A Porcupine Named Fluffy by Helen Lester some time during the first week of school. This is sweet story about a porcupine named Fluffy who discovers in many amusing ways that he is far from actually being fluffy. So, he sets out to make himself fluffier. He tries all kinds of silly ideas! It isn't until he meets a rhinoceros who has an unusual name too that he decides being himself is alright. If you haven't heard the story before, here is a read aloud I found on YouTube.


I am working on a series of studies of books by Helen Lester. A Porcupine Named Fluffy is the first one. You can check it out in my TpT store {HERE} or by clicking on the picture below.

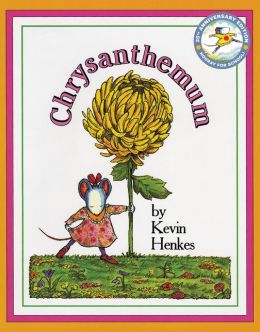
During the first week of school, we also read Chrysanthemum by Kevin Henkes.
Chrysanthemum also has lots of trouble with her name! Since Fluffy and Chrysanthemum have so much in common, why not compare and contrast these two texts? This week's freebie is a sample page from my new book study! Click the picture to download your copy! Enjoy!
Please stop by Deanna Jump's blog for more book chat blog posts! :)


Saturday, July 19, 2014

Close Reading Strategies

Close Reading is such a buzz word in education right now! (No, it doesn't mean holding the book close to your face as this picture may imply! hee hee) Close reading is reading text carefully and with intense purpose and focus. I have been using parts of the close reading method, but this coming year I want to try for full implementation. I had several dilemmas though.
  1. I only see my RtI students for a small amount of reading instruction time per day. After we gather our groups and review phonics and sight words, we have about 25 minutes of true reading group time left. So, how do I maximize the time? Is this enough time to implement Close Reading?
  2. These are RtI kids! How should I make this method accessible to them? They generally don't implement strategies well. I also needed this to work for multiple genres, too.
  3. They need (and I need) for these strategies to transfer over to their general classroom instruction time and independent reading time. What could I possibly give them that will be functional in all settings?
I have been mulling this over ALL SUMMER! Finally, an idea hit me! I want my students to be great readers, right? Why not use GREAT as their reading strategy acronym?!? So, here is what I came up with! 

G = Grab a text on your level.

This will work in all settings because with me they are given appropriate text to read, in class they have leveled texts to read, and during their independent reading time or A.R. time they check out books according to their assigned Lexile level. We will also go over strategies for how to tell if an unlabeled text is on your level. I think I will do a lot of the next steps using my Daily Common Core Reading Passages. You can purchase them individually by nine weeks or in a $ saving bundle in my store {HERE}.

R = Read the entire text.


This part we had already been implementing. We read the entire text all the way through without stopping for questions. We just sound out unknown words, use context clues as best we can, and keep chugging along until we've read it all. For this first read, our goal is just a general overview or the big idea of the text. 

E = Enjoy the details when you reread. 
In general, my kiddos initially resist the rereading portion of close reading. However, they do start to realize that their rereading wasn't as choppy and they can make better sense of the story the 2nd time around. This part is CRITICAL for gaining fluency and improving comprehension! Again, this will work for any genre. They will pick up more details about characters, theme, setting, sequence of events, etc. once they have read it through at least one other time. 

A = Annotate or mark the text.

Annotate is a big word, but kids love big words! I think with practice they can handle the word and the method, too. I am planning to use colored pencils, highlighters, highlighting tape, wiki sticks, and more to give them different annotation tasks. We will circle unknown words, put questions marks by parts we don't understand, number to sequence the story, underline story elements in different colors, and more. I think that a little daily practice will go a long way. The goal of course is to train them to think critically about what they read. They can't mark up their library book, but they can train themselves to mentally note when they see a word they don't understand. 

T = Text proof is found for every answer. 

To me, this one is as critical as the rereading. Whenever there is question about a text (whether it is written or oral), I am going to require my students to back up their answer with text evidence. If it is a literal question (Who? Where? What?), they will have to point to, circle, or refer to their evidence directly from what they read. If the question is inferential (How? Why? What makes you think that..?) they will have to find evidence to support their answer from clues in the text. For example, How do you think Junie B. felt when Lucille left her to chase Ricardo? I think that she felt angry BECAUSE the text says "I crossed my arms, stomped my foot, and did a huffy breath at Lucille". That is how people act when they are angry.

I put these images together along with some cut out letters to create this bulletin board. I even ventured into the school building during summer to grab this picture for you! You are welcome! ;)


Now, if you think that this set will be helpful to you, feel free to grab this freebie {HERE}! Please let me know what you think! It is my hope that these 5 strategies (leveled text, read entire, reread, annotate, and prove answer in text) will help our students become GREAT readers!


Tuesday, July 15, 2014

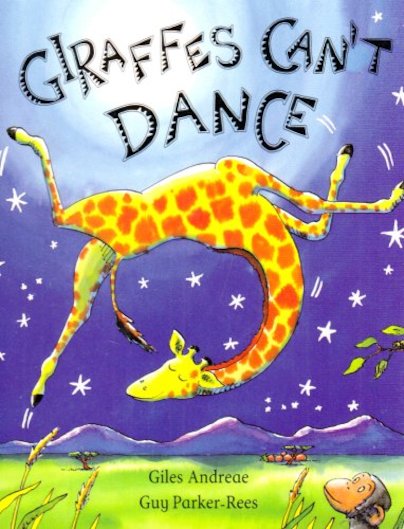
Giraffes Can't Dance Book Chat Fun

I love to start out the school year by reading Giraffes Can't Dance by Giles Andreae and Guy Parker-Rees! Kids come in to a new year with fears and presuppositions about what they can and can't do. This book is the perfect chance to get them to think of a new year as a fresh start full of possibilities! Gerald Giraffe is a terrible dancer (or so he thinks) until a wise cricket shows him that anyone can dance when they find the right music! 

I taught 2nd grade inclusion for a few years. I also used the different types of music and dancers in the book to discuss how everyone in our class was different and may need different things. We could all learn in our own way just as the animals danced in their own way!


I found a fantastic channel on YouTube. This artist has turned the poetry in the book into a song. LOVE IT! My sweeties love to watch video versions of books on our SMARTboard and this one is no exception! You can check out more awesome books set to music on the Fun Songs Guy's YouTube channel. {HERE}. I also have a Pinterest board full of video versions of books. You can check it out {HERE}.


I have no idea whose original idea this craft was. (Please let me know if you do so I can give proper credit.) I have made a few modifications to it over the years. I generally avoid painting due to the mess factor and time. Sadly, I never took any photos of all of the different versions that my students created, but my son loved hearing the story and volunteered to make his own version today. I gave him the book, crayons, scissors, glue, white paper, and a pack of construction paper, and let him go. This is his interpretation of Gerald's dancing under the moon and stars.
Again, what's a book chat without a freebie?!?  Here is a quick little story element organizer to go with your craft. Put it all together and you've got a couple of great centers! 1. Read the book. 2. Watch the video. 3. Make your craft. 4. Complete the organizer. Easy-peasy-mac-n-cheesy!  
Click HERE or on the picture to grab your freebie. 

You can read more book recommendations HERE at Deanna Jump's Book Talk Tuesday Linky Party!

Have a great day and remember the wise words of Gerald Giraffe, "We all can dance when we find music that we love." :)

Follow my blog with Bloglovin